
This article shows how to install the Desert Cooling tank kit (surge tank) on the MB GPW WWII Jeep Grill.


|
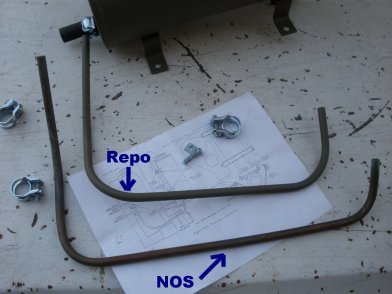
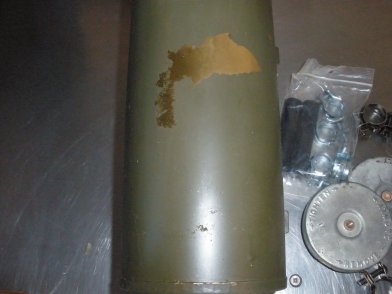
1. To start this article, we compare Harley Padilla's NOS desert cooling kit to the Paulo Batisti Repo Desert Cooling kit A6933 K. There are some differences that you may encounter. |
|
2. One of the differences is the length of the tubing. The NOS tubing is about 2 inches longer than the Repo kit. But the Repo kit tubing aligned better to the GPW Radiator tubing in which we installed. |
|
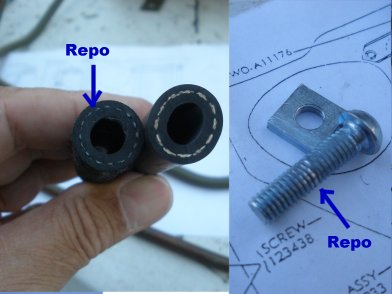
3. Another issue discovered with the Repo kit was the hose size...which was smaller than we would hoped for the clamps (so we replaced with better), AND the clamp screws stripped really easily when tightening down. So we replaced with NOS 10-24's. |
|
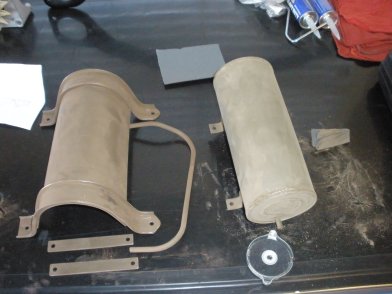
4. Before we install the Desert Cooling kit, we are going to prepare to paint it the color of our 1945 GPW. Here we use some fine sand paper and scuff the pieces up that will be painted. |
|
5. After wiping down the parts from the dust, we paint all the parts with the color of the jeep it will be installed on. |
|
6. NOTE: The NOS kits will have cosmoline on them, if you use laquer thinner to remove the Cosmoline, it will take the paint off as well, then you will need to strip the whole kit to repaint. |
|
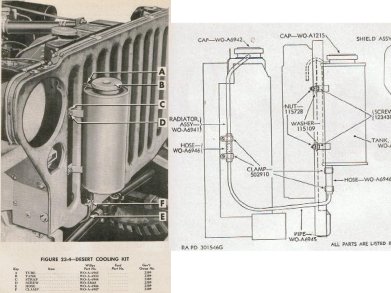
7. Unfortunately, the SNL G503 (oct 49) , page 80, are the same instructions that come with the kit, and very little verbage to assist you. |
|
8. NOTE: engine and coolant should be cool before installing for safety. The first step is to connect the bottom hose and clamps to the bottom of the surge tank. The shorter end of the hose will connect to the bottom of the surge tank. Here we want to measure it up and see how it will line up to the radiator hose. |
|
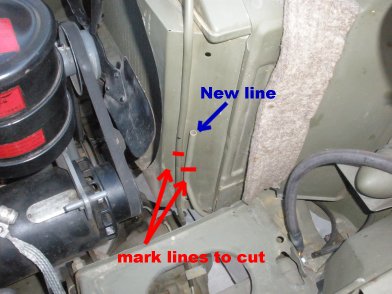
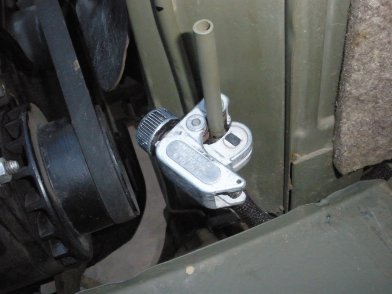
9. Next, remove your battery, hold the surge tank up against the grill with the new line running through the second grill opening on the passenger side. Run the line under the battery tray, and it should line up against your current radiator line. Mark a line on your radiator tubing, and pull surge tank back out. |
|
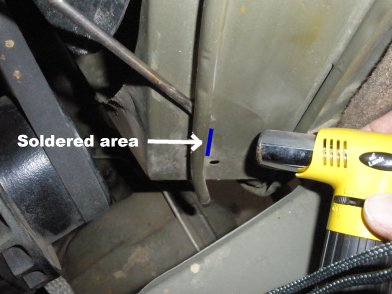
10. Your radiator overflow tubing is soldered to the shroud in a couple places. We need to remove one of them in order to prepare connection to the desert cooling tubing. By holding a micro-torch to the soldered area for a few seconds, wedge a screwdriver into this area apply pressure to pop off. |
|
11. Use a small tubing cutter to cut the radiator overflow line, and the desert cooling line. Here we show an example, but easier if you take the tubing out of the area. |
|
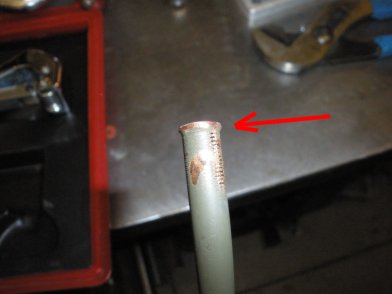
12. Improvision: With everything ready and lined up, we made one last improvision to make sure the fluids hold without leaking. We used a flaring tool at the ends of the tubing so when we clamp it down the fluids will hold. |

|
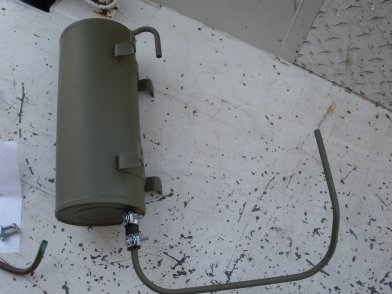
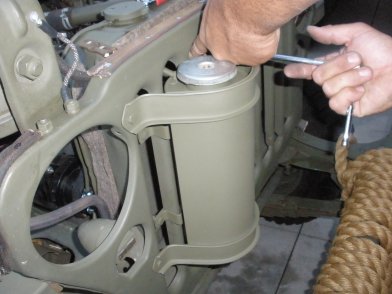
13. Now, connect the surge tank to the grill. Place the back straps to the upper and lower portions of the tank, and bolt down with flat washer and lock washer. |
|
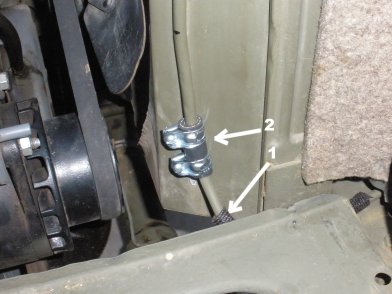
14. Optional 1: We added a protective strip around the desert cooling tubing as it was pretty close to the battery tray, and 2) we connected the tubing to the radiator overflow tubing as shown. |
|
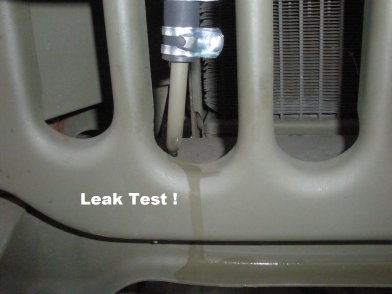
15. Now it is time to do the Leak Test! Add fluid and top off the Radiator, and fill the surge tank about 1/2 full. and check for leaks. Assuming no leaks, continue on! |
|
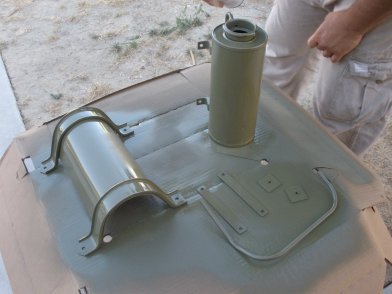
16. At this point your surge tank should be installed, filled with water, and no leaks. Now to install the protective shield. |
|
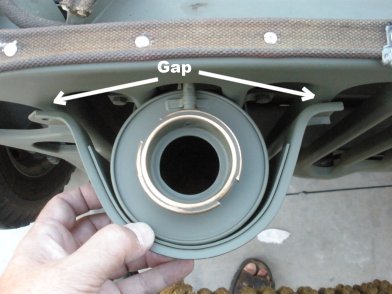
17. When you place the protective shield against the surge tank you will notice it doesn't quite site flush against the grill. The NOS shield was the same. |
|
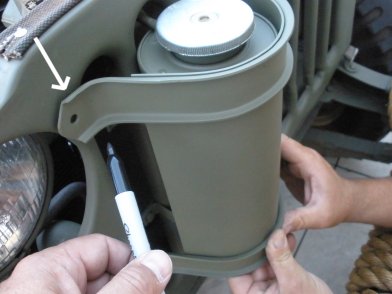
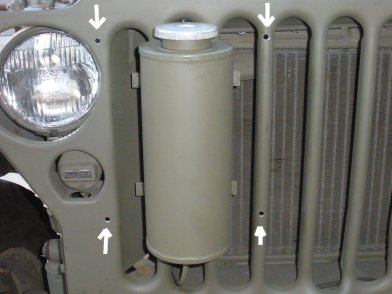
18. Hold the shield against the tank and line up the against the grill. Mark the four holes that will need to be drilled with a 1/4in drill bit. Also note that only one side of the shield has a pointed end, this end should go nearst to the passenger side as shown. |
|
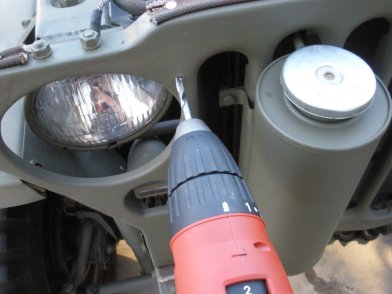
19. When the holes are lined up, then drill them out. NOTE: where your wiring is located behind the grill before you drill your holes. |
|
20. With all four holes drilled, you can now install the protective shield. |
|
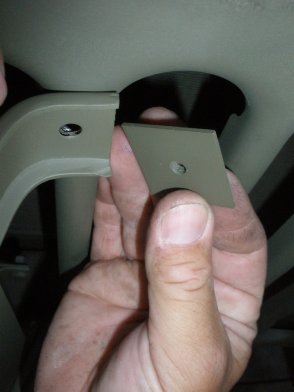
21. Included in the kit, are two backing plates which are installed on the right side of the protective shield. |
|
22. Tighten down the bolts, washers, nuts on the protective shield. |

|
23. Here is the backside of the drilled holes in the grille with the nut tighted down. Here you can see the position. |
|
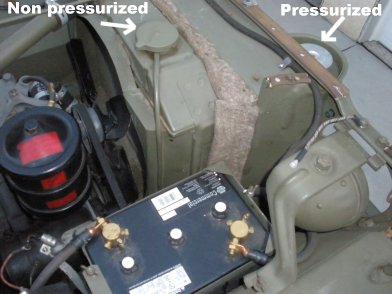
24. After replacing your battery, VERY IMPORTANT... put your pressurized radiator cap on the surge tank, and the Non Pressurized (kit cap) cap on the radiator as shown. |

|
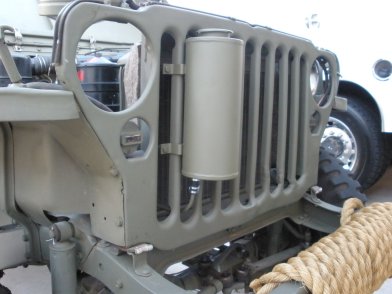
25. All Done! Your Desert Cooling system is now installed. Your system will now push fluid into and take from your surge tank! |

|
26. Special thanks again to Harley P. for the donating of parts and experience to making this article possible to assist others in the hobby! |
