
Over the coarse of time G503 WWII Jeep Go Devil Engine Valve Adjustment is required. You don't need to be a mechanic to do this, but sometimes having an extra pair of hands and eyes would help.


|
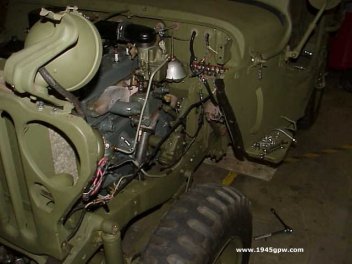
1. After a complete engine rebuild and very little burn in time, I heard a little clicking when I rev-ed the engine. My thought was that it was a small adjustment needed with the valves. Here are the steps I used to make that adjustment. I am no expert, but this may help you. |
|
2. There are two bolts holding the valve cover on. I believe they are 1/2in. Unscrew them, and pop the valve cover off. Note: depending on how old your valve cover gasket is, you may need to replace it. |
|
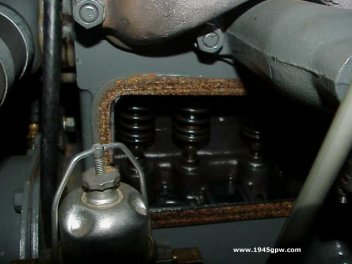
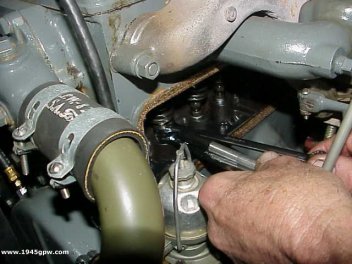
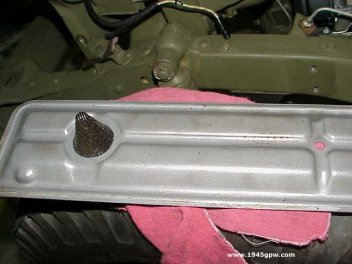
3. Here you see the cover popped off. Gasket still looks good, but how do I get the valve cover out? I removed the PCV line and disconnected the exhaust pipe as well. |
|
4. Ok, now that the cover is off, I removed the PCV line and the exhaust pipe which allowed me to get the cover out. I wiped down around the cover, and made sure I didn't have any drips. |

|
5. In order to adjust the valves they have to be in a certain position, so turning the crank will be necessary. I removed the spark plugs to make that an easier chore. |
|
6. It doesn't really matter the order of the valves you are going to adjust, so you can start with any of them in the closed position. The tappet will be all the way down when closed. Have someone turn the crank (clockwise) until your designated valve is in the down position. |
|
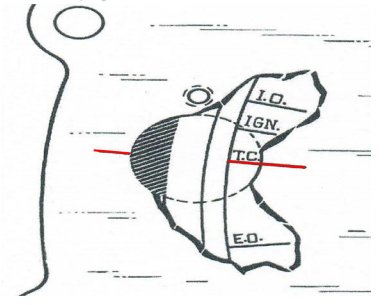
7. (Tip by John Gibbins) With a crank handle, rotate the crankshaft to the Top Dead Center (TDC) position on flywheel markings.1. Adjust both number 1 valves by screwing the adjuster till there is just no play then unscrewing/loosening the adjuster only 2 flats of the hex head. That will give you exactly 0.014" gap. 2. Turn engine with crank 180 degrees then the chalk mark will be on the right side parallel to the ground. Now adjust both no 3 tappets, exactly as done in 1. 3. Continue same 180 degrees for remaining two valves. |
|
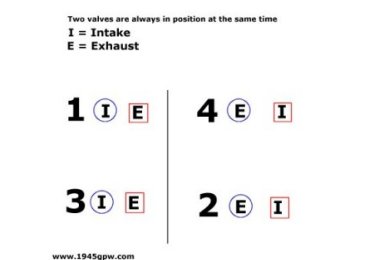
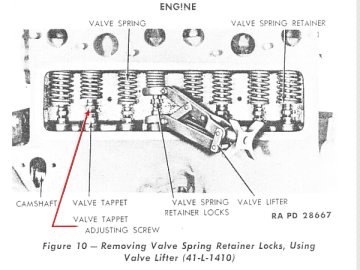
8. Now, another way to think about this, you have 8 valves. 4 are intake, and 4 are exhaust. There are always two valves in position at the same time. The diagram below helps explain this. For example, If I want Cylinder 1 Intake valve to be closed (so I can check the gap .014), then Cylinder 4 Exhaust is in the same position and I can check it. Therefore, you can check two valves with each crank position. |
|
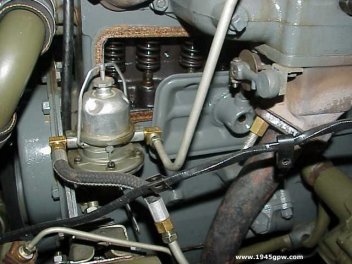
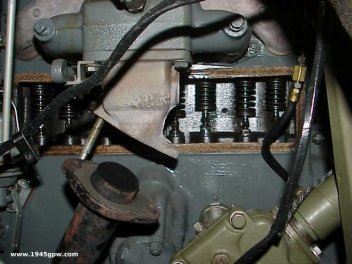
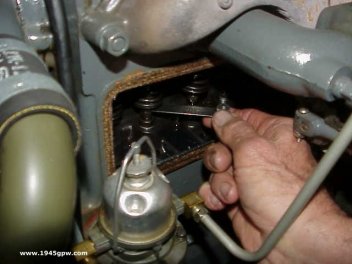
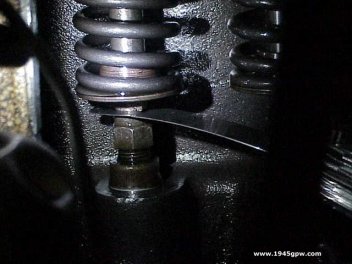
9. Here you see I am checking the gap of the valve in Cylinder 1 intake. Therefore, Cylinder 4 Exhaust can be checked as well. |
|
10. Here is a close up of what you are checking the gap on. According the the TM the gap should be .014 when cold for both intake and exhaust. |
|
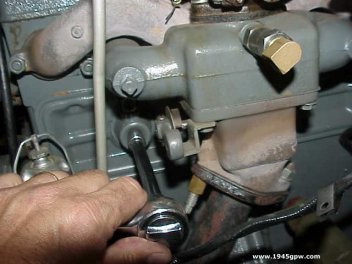
11. To adjust these, you will need two 1/2in open end wrenches. In my case, I had a bigger gap than I wanted. You place one wrench on the tappet (bottom) and one wrench on the top nut. Then you separate the wrenches to make the gap more narrow. In my case, I needed to bring go from .015 to .014. When I make the adjustment, I check again with the gap tool. |
|
12. (TIP by Pete Silfven) Adjusting valve clearance when the tappet is worn cupped and it can't be done with a feeler gauge. The tappet thread is 24 threads per inch. To find out how much the tappet adjuster moves in one revolution, divide 1.000 by 24. This gives a movement of almost .042" per revolution. |
|
13. (TIP by Pete Silfven) There are 6 flats on the adjuster screw, so we divide .042 by 6, and get .007" per flat. Now, with the cam in position to adjust a particular valve, unscrew the adjuster to the point where the tappet just quits revolving freely This is zero lash. Then screw the adjuster in the proper number of flats to get the correct clearance. For .014", that will be 2 flats. |
|
14. After each pair of valves get (from diagram above) get verified, turn the crank to the next pair as shown in the above diagram, and repeat the steps. I finished mine in about 1 hr. I needed someone to hold my LED pen light and to turn the crank, so it will help to have a friend. |
|
15. Valve cover installed back on. |
|
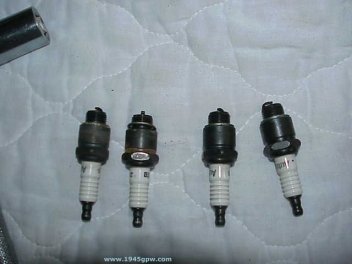
16. While the spark plugs where out, I cleaned them up and re-gapped them. |
|
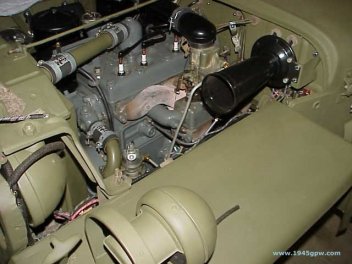
17. Replace the fender and components and you are done. The complete task will take about 4hrs. |
