
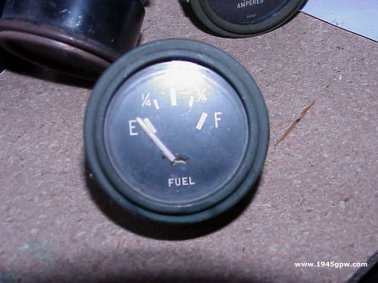
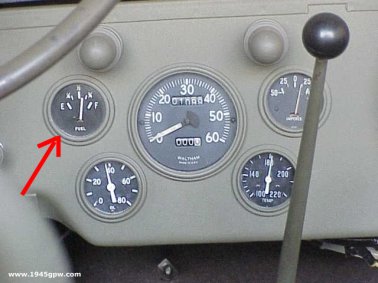
The Fuel Gauge on the G503 WWII Jeep is a bit sensitive to its connections. Many times the reading is not accurate due to the connections. We will explain areas to check.


|
1. The Fuel Guage in the 40's is built on electrical resistance. The more resistance from one post to the other allows the gauge to move from one side to the other. Nine times out of Ten the problem with a Fuel Gauge reading has to do with the grounding on the gauge. |
|
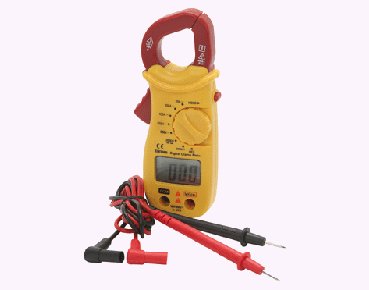
2. You will need a simple meter to test the ohms on your fuel gauge. These are really inexpensive currently. This one was $9.99 at Harbor Freight These are necessary to troubleshoot electrical problems with your jeep. |
|
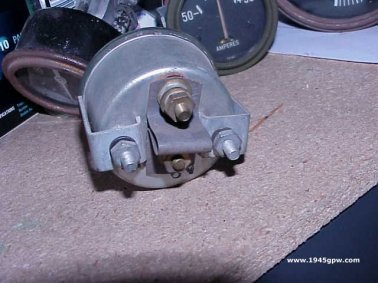
3. If your fuel gauge doesn't work while in your jeep, pull it out and you will need to get a meter and check the resistance of the posts on the back side of the gauge. One post is for the power from the ignition, the middle post is the connection from the Fuel tank sending unit, and the last post is for a ground. |
|
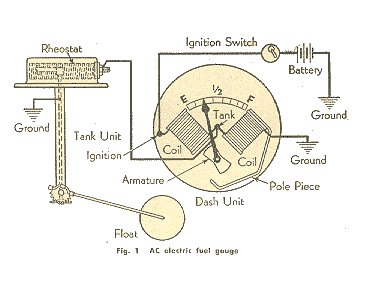
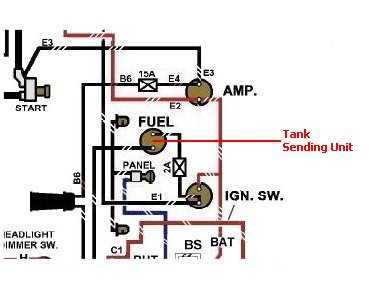
4. Let's take a look at what is going on. There are two devices that are connected together. The Fuel Gauge and the Tank Sending unit. These two items are connected together with a single wire. |
|
5. Glancing back at a section of the Wiring Diagram, you don't see the Fuel Sending unit connection, but here in red is where it would be connected. |
|
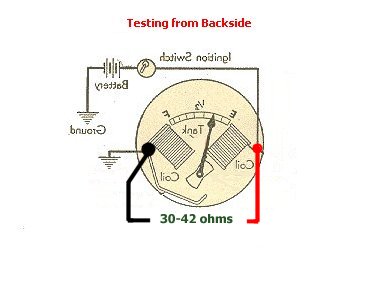
6. Now let's check the resistance of the posts. Here you see what the resistance should be of the two main posts. It should register between 30 ohms and 42 ohms. Usually if there is a connection problem with your fuel gauge the reading will go to 1 on your meter. |
|
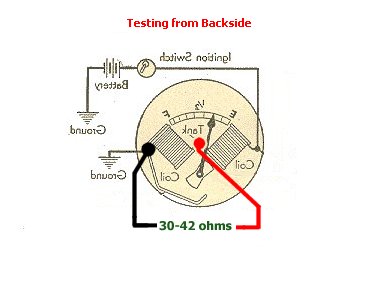
7. Next we want to check the resistance between one main post and the center post. This should read around the 30 ohms - 42 ohms as well. |
|
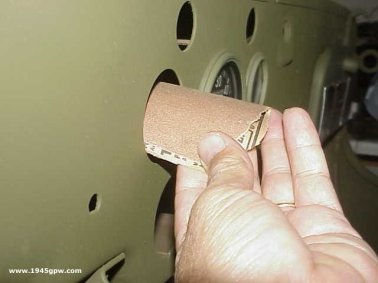
8. If your readings on your guage looks correct, then your issue is not the gauge, but rather the grounding. TIP: before you put your gauge back into the dash, clear the paint around the dash hole so that the exposed metal will connect with the casing of the fuel gauge. Sanding around the edges of the Fuel Gauge casing may also help the grounding of the gauge. |
|
9. Now install the Fuel Gauge and hook up the connections. When the ignition is OFF, the Fuel reading should be sitting on EMPTY. If you turn on the ignition and the fuel gauge JUMPS to FULL (and the tank is not full) then most likely there is an issue with the Sending Unit. If it reads correctly then your set! |
|
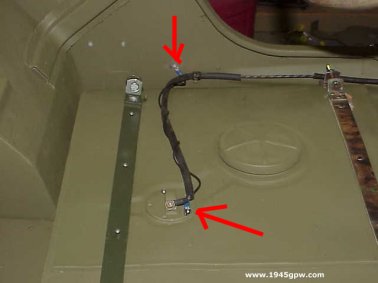
10. Still having a problem?? At this point, there are probably one of two problems. The sending unit is bad, or the gauge still is not getting a good ground. The symptom of a bad ground will be the fuel gauge will read FULL and only slightly go down when the tank is empty. If this is the case then make sure you follow steps in #7 above, or verify you have a ground running from the fuel tank sending unit as shown here. |
|
11. If you know you have a problem with your Fuel Gauge and you need to repair it, you can follow these steps here for repairing your gauge yourself. |
