
Tuning up your G503 WWII Jeep Go Devil engine is not difficult, but you do need a couple of inexpensive tools to complete the task. We show you how here.


|
1. For the best performance and dependability, the engine should have a tune up every 6,000 - 10,000 miles according to TM 10-1513. |

|
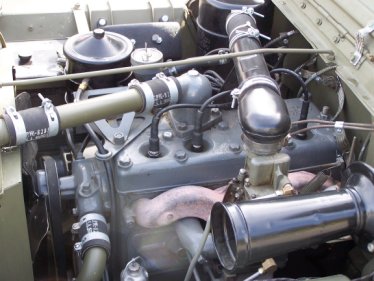
2. Most people forget that a tune up is more than just distributor and spark plugs. The TM's recommend to check the connections on the Battery Terminals, ground straps and verify all of the connections to Starter, Generator, Coil, Regulator all all tight and with no corrosion. Here are some of the points you should inspect the connections. |
|
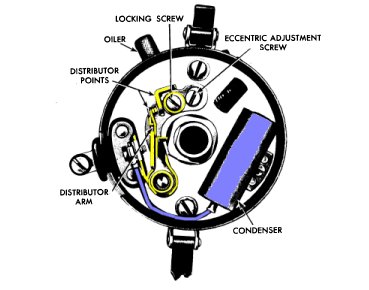
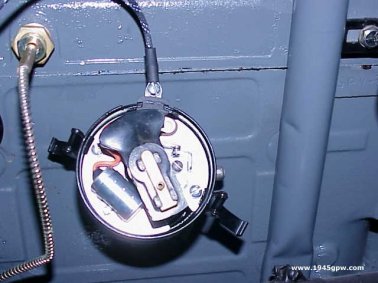
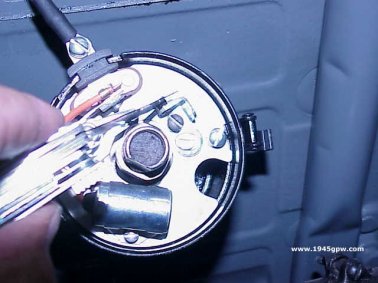
3. Let's start with the distributor. Remove the cap by removing the two clips holding the cap on. Here is what you see inside. Ideally, you should take the rotor off so you can see the points and condenser. There are just a couple of screws that hold these pieces in the distributor so its pretty easy to figure out. |
|
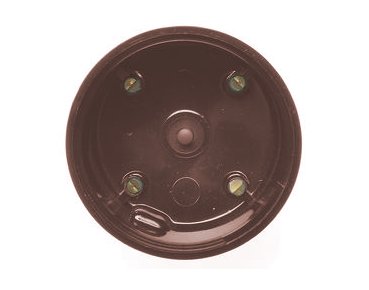
4. With the cap off, you want to inspect the bottom of the cap. You are looking for issues dealing with arcing. If you see damage to the cap due to excessive arcing, then replace the cap. If not, you may want to clean the cap inside and out. |
|
5. Inspect or replace the distributor points. If you replace them (inspecting for excessive arcing where the points come together), remove the screws holding the points on. Replace with the new points. To see the points clearly, remove the rotor. |
|
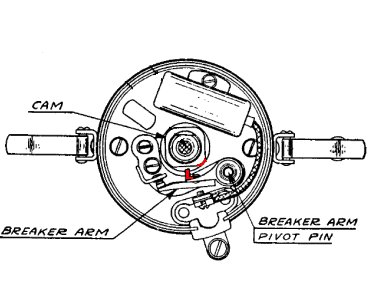
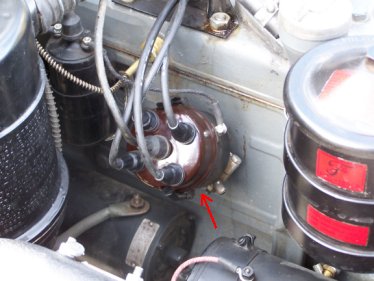
6. To Gap the points correctly you need to make sure the engine is turned so that the points are sitting on one of the four corners of the distributor shaft. The area shown in red shows where the corner of the cam needs to meet the arm of the points in order to set the gap. |
|
7. Once the arm of the points is sitting on one of the four corners of the distributor shaft, you can move the points in or out. With your feeler gauge find the .020 feeler, and check the gap. If you need more, then move the points open more, if less, move closer. Also, lube the cam shaft where the points touch lightly. |
|
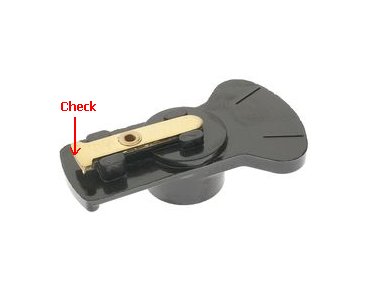
8. Once the distributor points are gapped correctly, inspect the rotor, and see if there is any wear due to arcing. This would be a type of melting of the metal tipe that spins around. You can wipe off any residue, but if the tip looks worn out, then replace it. |
|
9. Attach the rotor and distributor cap back into position, and clip back on. |
|
|
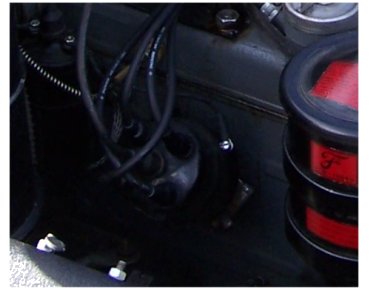
10. Next, inspect your spark plug cables. Look for areas of cracking. The repo cables are common for cracking. If there are cracks, then you have a posibility of arc within your engine compartment, thus loosing power. |
|
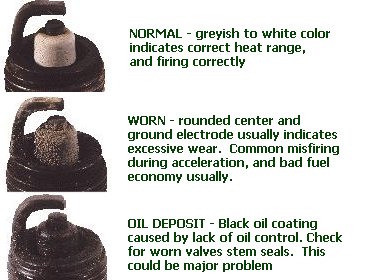
11. Remove your spark plugs and inspect them. Your spark plugs should have residue from the gas mixture igniting. You should not have signs of water, coolant, excessive oil. Also, if the plugs look worn down, they should be replaced. With unleaded fuels of today, there are much less deposits left on the sparkplugs then years ago. |
|
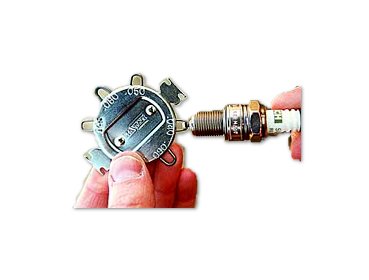
12. Installing new spark plugs is easy. First, turn the spark plug over and gap the arm clearance at .030 in clearance. Once completed, then screw in the spark plug and reattach the sparkplug wire. TIP: do these one at a time so you don't mess up your firing order (wrong cable to wrong plug) |
|
13. When the points, condenser, wires, and spark plugs have all been checked, then you want to check the timing of the vehicle. If your engine would start prior to your tune up, then it will probably work after you install these pieces. Try and start the vehicle. If it starts, get your timing gun out. If not, then go back to step one and start checking your gaps on condenser and plugs. |
|
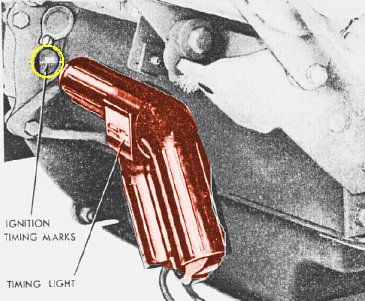
14. Assuming that you have your engine idling attach your timing gun to your battery (if it is a 12v timing gun attach the power to another car). Then place the cable clip around the number 1 spark plug wire. Your time gun light should look like a strobe light. |
|
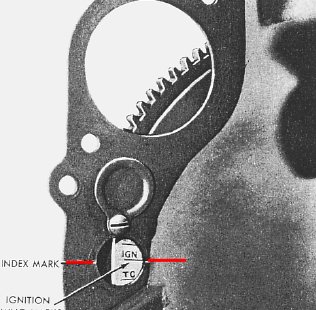
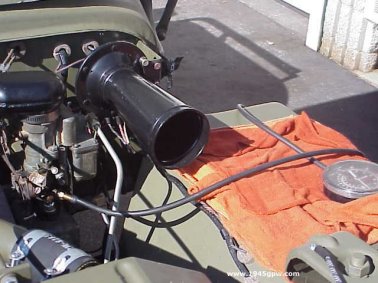
15. Point the timing gun light down to the area next to the start and Remove the timing cover plate, and the blink of the light should match the IGN (compression stroke) setting on the flywheel as it spins around. If it is after or before the light, then you have to adjust the distributor to line it up. |
|
16. Adjusting the Distributor : Slightly loosen the distributor bolt into the block so the distributor can turn. While the engine is running, point the timing light to the flywheel. If you turn the distributor clockwise you are advancing the timing, thus making the markings move forward or up. If you turn the distibutor counterclockwise you are slowing the timing down, i.e. markings will go down. |

|
17. When you move the distributor one way or the other, you should be able to hear it run better as you approach the proper timing setting. The sound of the engine running should produce a consisitent "purring" when idling. |
|
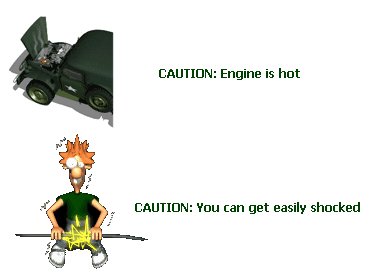
18. TIP: Becareful when touching any of the engine components while engine is running. 1) engine will be hot 2) Electrical shock can zap you when touching components. |
|
|
19. After the distributor is located in its optimium position, tighten the nut holding the distributor, and disconnect the timing light. |
|
20. Next, you will want to check the Fuel system in the carburaetor. If you have a vacuum gauge connect it to the carb and let your jeep idle. While idling, you want to adjust the carb to the minimum setting before the jeep will die out. |
|
|
21. Steps under review. |
