
This article shows you how to remove your WWII Jeep tub from your frame and how to disconnect all of the components to do so.


|
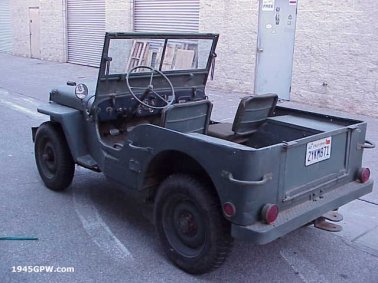
1. Preparing the WWII Jeep tub for removal is not difficult, but you will need a couple people to help lift off the frame or a hoist to complete. First, lets assume you are starting with the tub connected and jeep wired up as shown. Disconnect the battery. |
|
2. Remove the WindshieldYou want to start by removing external items off tub first. Tip: If you need to remember where things go, tag items as you go along. |
|
3. Remove the Mirror, remove items that will get in the way or get hung up as you lift the tub off the frame. Note: leave the handles on, you will need these. |
|
4. Remove the Axe and Shovel. If you have these items on your jeep, remove them as they will get in the way and add weight to the lifting |
|
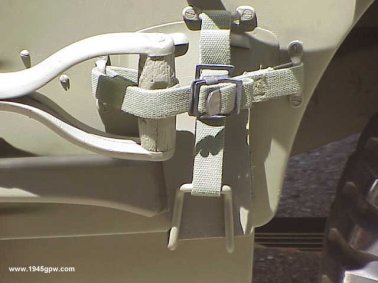
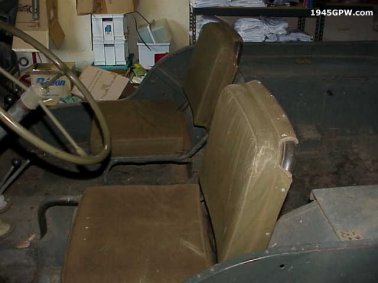
5. Remove front and rear seats from tub. The front seats are bolted into the floor, but the rear seat will have two hooks into the rear panel that need to be removed, and if you have the Rear seat lower support retaining brackets installed on the wheel housing, then remove em. |
|
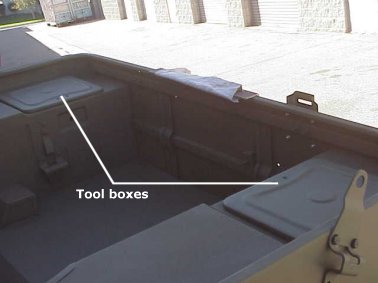
6. Remove anything that may be in the tool boxes. This will add to weight and if you end up turning the tub upside down, anything left in the tool boxes will come crashing down. |
|
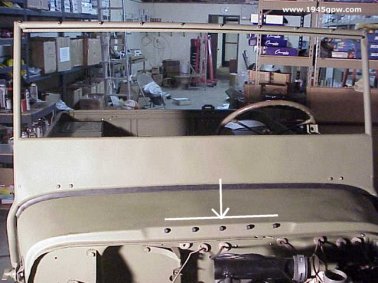
7. Remove the Hood from the tub. Open the Hood up and there are 5 bolts that are holding the hood into the tub. |
|
8. Remove both front fenders. If you don't want to take them completely off, remove the 3 bolts on each fender that are screwed into the tub, and the two that are screwed into the footrest. |
|
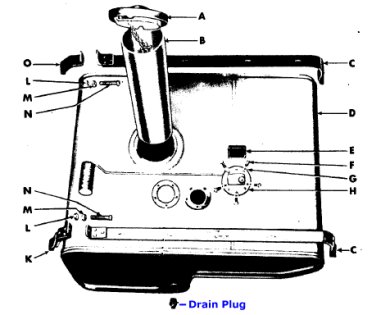
9. Empty fuel tank and disconnect the line. The drain plug on the fuel tank is located at the rear of the tank well. Remove this plug and catch the fuel in a container. |
|
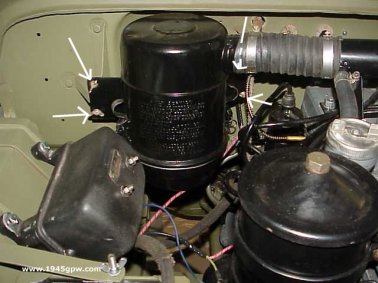
10. Disconnect the air filter from the firewall. Remove the 4 wingnuts that hold the Air filter on. Probably best to disconnect the Air Filter hose as well and set the unit aside |
|
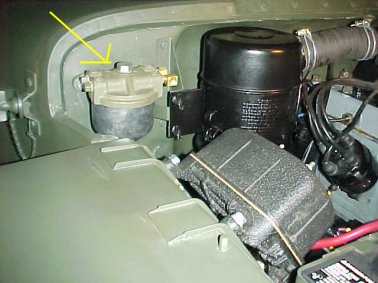
11. For early models, Remove your Fuel Strainer from the Firewall. The fuel lines on early model WWII jeeps use this strainer |
|
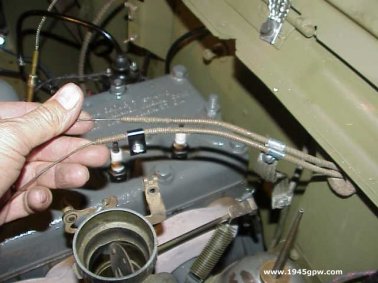
12. Disconnect the Choke and throttle from Carburetor. The important part is to remove from the carburetor. If you want you can unscrew from the dash and pull lines through the firewall. |
|
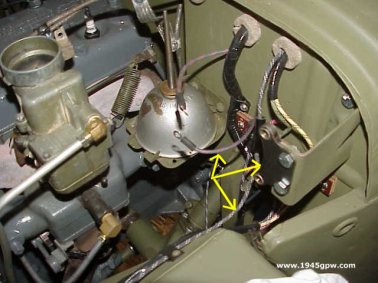
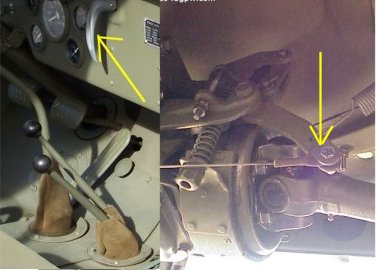
13. Disconnect the Foot Gas Pedal linkage. This is a little difficult to get to, but there should be a cotter pin that is holding the gas pedal arm to the linkage on the carb. You need to reach in and remove that connection. |
|
14. Disconnect the Temperature Gauge. Note, before doing this you should drain your fluid at least far enough down that it won't flow from this part in the head. |

|
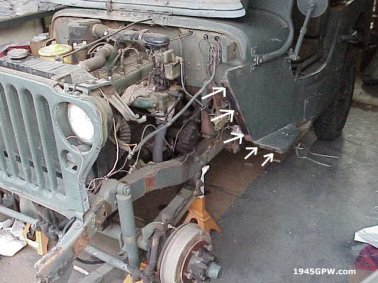
15. Disconnect Wiring to Junction. At this point you don't need to disconnect everything, just the wiring that is coming from the fenders to the headlight and blackout lights. |
|
16. Disconnect and Remove Horn. You want to remove your horn and the connections to it to preserve it otherwise you may ding it up when you are moving your tub around |
|
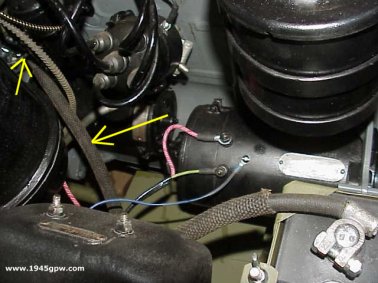
17. Disconnect Foot Starter wire. Hard to see in this picture, but if you have a foot starter installed, follow the wire to the bottom of the tub. Its a little difficult to get to. |
|
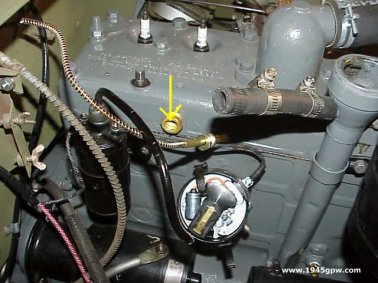
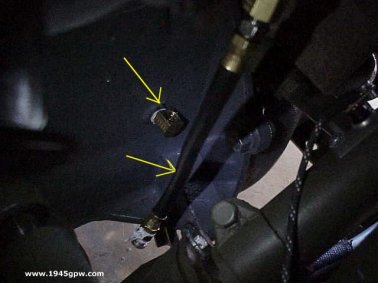
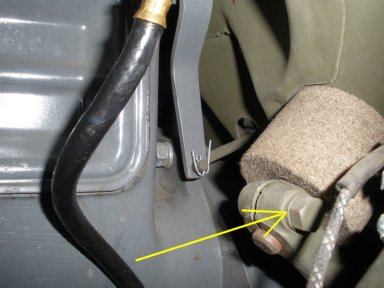
18. Disconnect Oil Gauge Line. The line will come out of the firewall and attach to the driverside brass fitting as shown. Disconnect this line. |
|
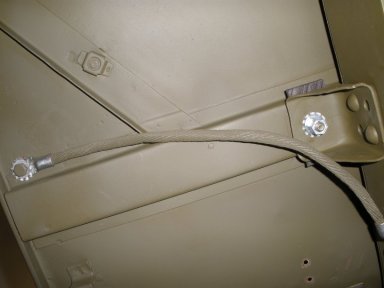
19. Remove ground strap from tub to frame (if present), NOTE: and the clamp that holds the muffler out the passenger side (before late 44 models) and not shown in this same area. |
|
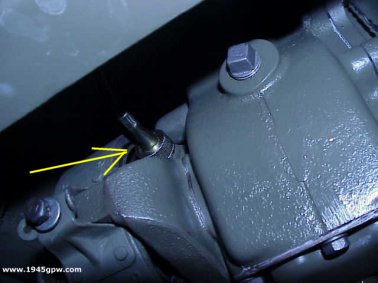
20. Remove the Speedometer cable line from transfer case. This is found under the passenger side, follow the cable to the transfercase and unscrew |
|
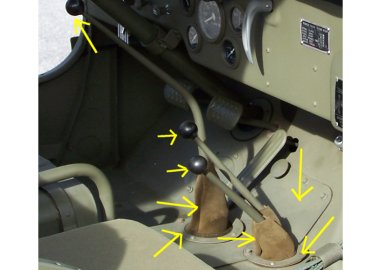
21. Remove floor plates and boots around gear shifts. Remove the gear shift knobs then remove the screws that hold the plates on, and pull the boots off. These will be in the way. |
|
22. Remove the emergency brake connection. Follow this cable out the firewall, and down around to the transmission. There will be a connection for this line you need to remove. |

|
23. (optional)Disconnect the rear tail lights. Should be able to push and twist the connection off of the tail lights. If you are going to sit the tub up on its rear panel, you may want to remove the lights in the housing. Otherwise, you can leave them connected. |
|
24. Remove the bolts from the pedal shafts, and pull the pedals completely out. Be sure to remove both clutch and brake pedals |
|
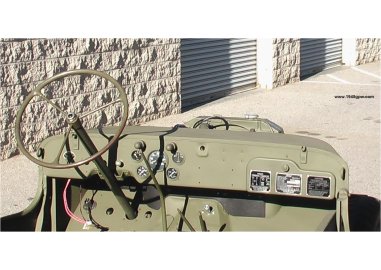
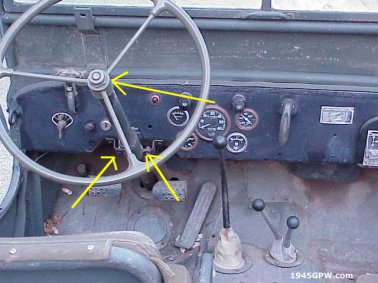
25. Remove Steering wheel and steering shaft bracket. Might seem easy, but many of the steering wheels are frozen on. Undo the nut, then you may need to spray penetrating oil under the steering wheel casing and tap to free it up. The bracket is two simple bolts. |
|
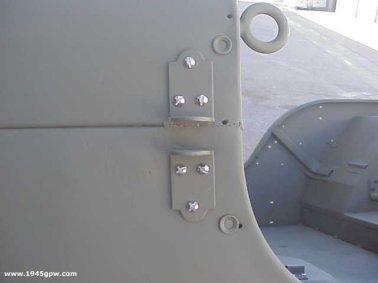
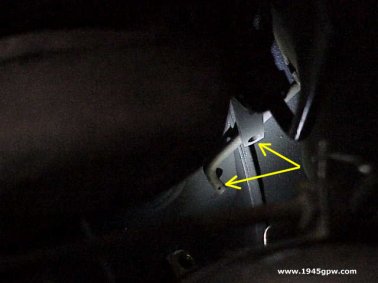
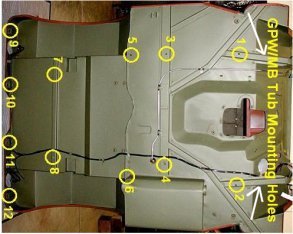
26. Remove the bolts from the frame. This picture was borrowed with permission from Darryl D. Locate each of these bolts on the tub and remove. There should be two bolts that are screwed into the frame where white arrows are in the gussets, remove them and your tub should be ready to pull up. |
|
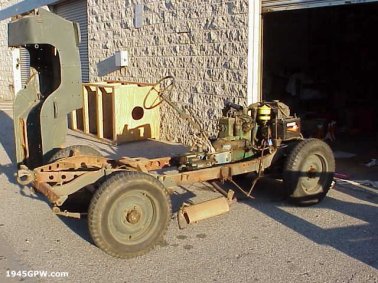
27. At this point your tub should be ready to remove. You should have at least 4 people lift up the front of the tub over the steering wheel column, you have to move around the gear shifts while lifting as well. With the handles still on the tub, you should be able to lift it. Some have used their engine hoist. Tub weights about 500lbs. |

|
28. To Reattach the Tub..., follow these steps from the bottom up! |
