
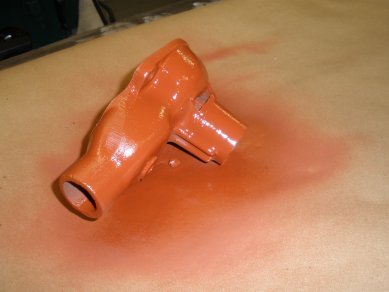
This article shows a step by step process of restoring your G503 WWII Jeep Engine Water Pump


|
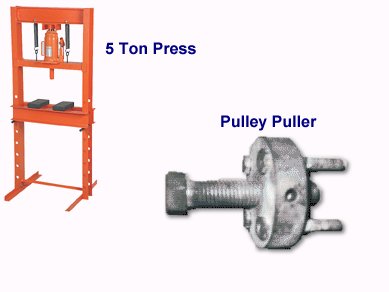
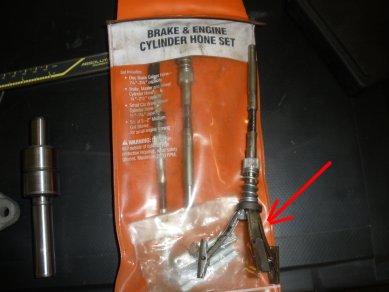
1. Note: you need access to specific tools to rebuild a water pump |
|
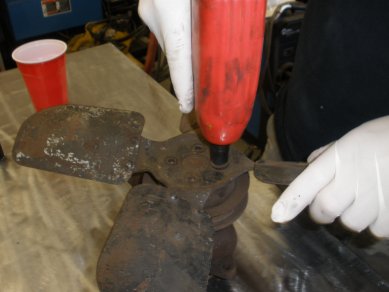
2. We start by removing the fan blade off a water pump. Special thanks to Harley Padilla who has the knowledge and equipment to make this article possible. |
|
3. Before we start, here are they tools you will need access to. |
|
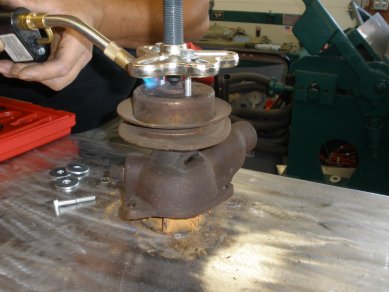
4. We start by screwing in the pulley puller onto the pulley. Here we use a modern pulley, and heat the pulley just before we start to rotate the pulley bolt to remove the pulley. Also, don't forget to pull the bearing wire out with some needle nose pliers. |
|
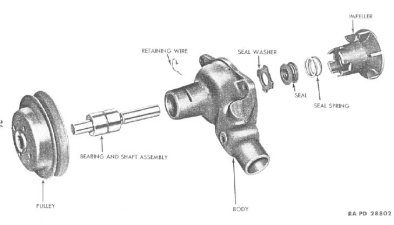
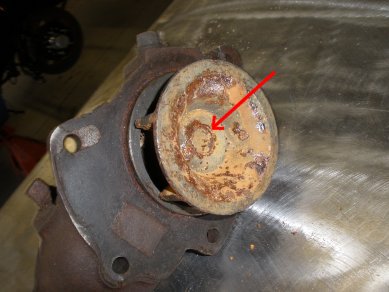
5. If you take a look at the cast iron impeller at the rear of the water pump, you see that the center shaft is held on by a press fit. This means to remove it you will need a press. |
|
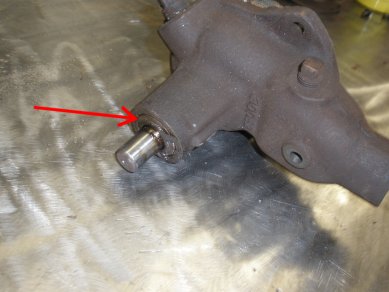
6. Likewise, the bearing shaft will also require a press to push the shaft out. In our case, it took a minimum of a 5 ton press to remove this bearing shaft. |
|
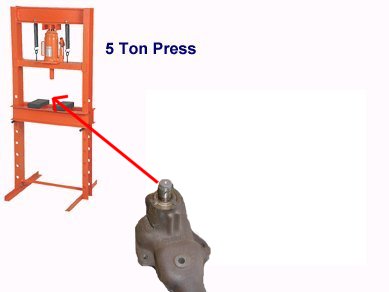
7. Place you water pump in the 5 ton press and push the bearing shaft out the cast iron water pump casing. Also use your press to push out the bearing shaft from the impeller. |
|
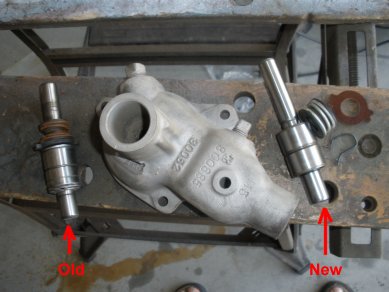
8. Here we have sand blasted the water pump, and compare the old bearing shaft and spring to the new rebuild kit bearing shaft. New kit looks good. |
|
9. We measured the diameter of the new bearing shaft and the inside diameter of the water pump and decided to hone (smooth) the inside of the water pump. Here used and Engine Honeing kit. |
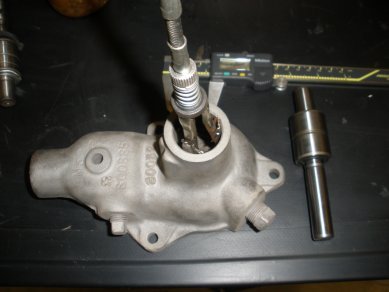
|
10. We used a standard drill and the honing kit to smooth around the inside of the water pump in preparation of the pressing the new bearing shaft. |
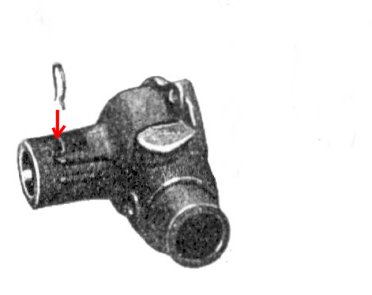
|
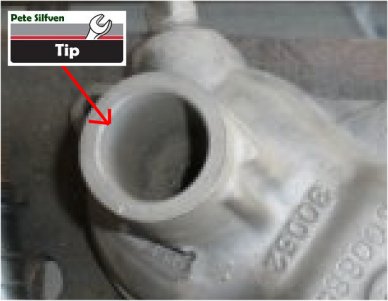
11. Pete Silfven Tip: The face of the pump housing that the seal rides on needs to be smooth and flat. If it is rusted or pitted you will need to use a facing tool to create that smooth surface, most likely at a professional shop. |
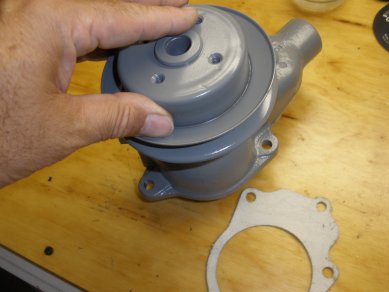
|
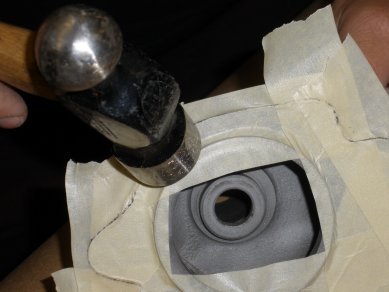
12. Before we press the bearing shaft we are going to primer the casing. Here we tape the surface area to protect where the gasket will be applied. Tip: use a hammer and tap on the edges and the excess tape will tear right off for a clean protection area. |
|
13. Primer the casing and the impeller. |
|
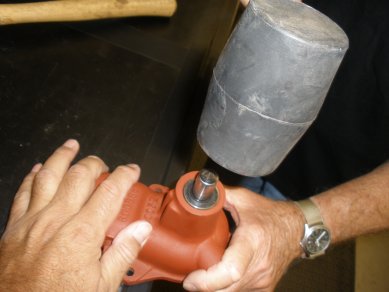
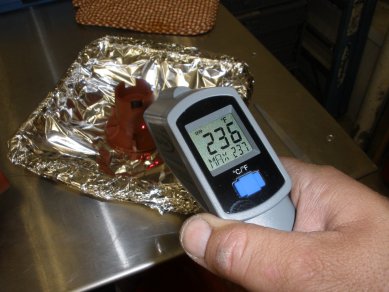
14. After the primer dried,Note: the TM shows to use the press to push the bearing shaft into position. we heated the casing up to about 250 degrees for about 30 minutes and took the bearing shaft and gently tapped it in with a rubber mallot, being carefull not to damage the water sealed bearing. |
|
15. After the bearing shaft has been installed with a press into the casing, we are now ready to press fit the impeller to the back of the shaft. After checking the measurements, and the impeller only a couple thousands dimension different, we decided to head the impeller an push it on gently. Note, you want to be careful not to damage the bearing shaft by not pounding on the impeller. |
|
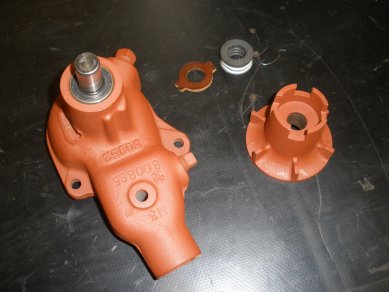
16. Here we take a look at the back side of the water pump bearing shaft and where the impeller will be installed. |
|
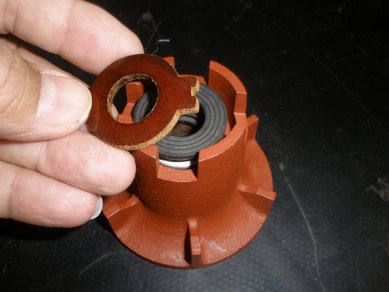
17. Prior to heating up the impeller for installation we took a look at the seal and seal spring and the position we are looking at prior to installing on the water pump |
|
18. We heated the impeller for about 30 minutes at around 250 degrees. As mentioned earlier we are only a couple thousands diameter off from the bearing shaft so we want the impeller inside diameter to grow just enough for us to slap this on. |
|
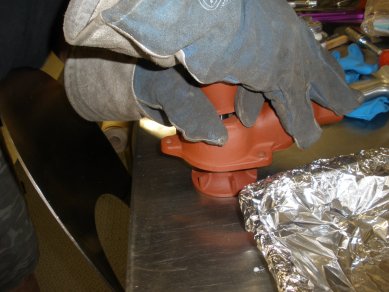
19. With the impeller hot, we put on some welders gloves and quickly placed the seal spring and seal on the impeller and pushed the impeller on the bearing shaft as far as we could. Then we gently tapped the top of the bearing shaft to |
|
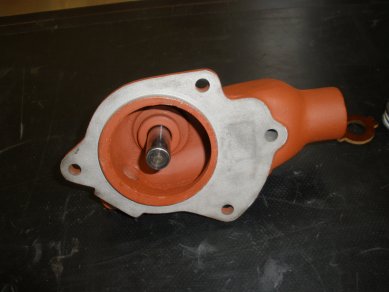
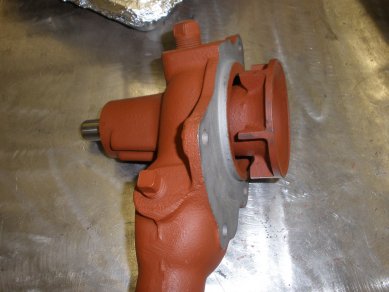
20. Terrific! the impeller should be pushed to the end of the shaft as directed by the TM. |
|
21. Install the bearing wire by pushing down around the grove on the bearing shaft and using kneedle nose pliers. Push down on the wire while turning the shaft will give the best results. |
|
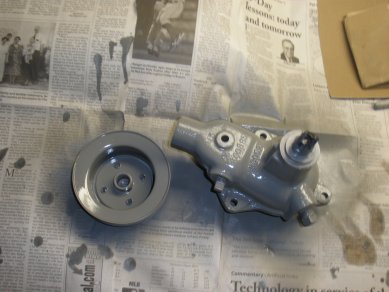
22. Before you install the pulley, be sure to paint it the color of your engine, OD or Gray depending on MB or GPW. Note: if you painted after the pulley is installed you would not be able to get to the underside of the pulley area. |
|
23. With a Cold Press, press the pulley onto the water pump shaft. You want the shaft to be right up to the edge of the pulley and you are done! |
